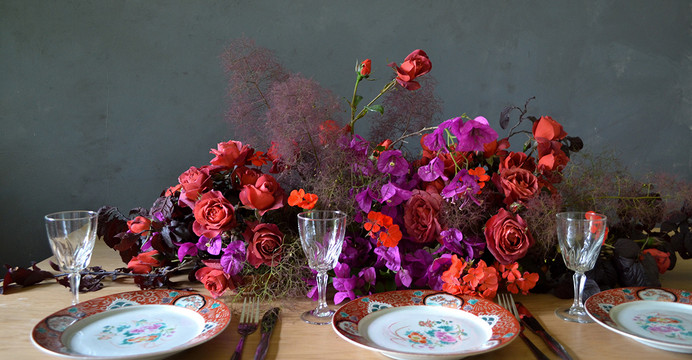

Decorating your Christmas table is something we all love to have fun with! Add some fresh florals and create a beautiful piece to show off to guests with Botany, using kenzans and only 5 elements. This type of arrangement is best made on Christmas Eve or Christmas morning.
Video length: 9 minutes | Reading time: 10 minutes.
Watch our easy to follow video for a demonstration of how to build your arrangement, or follow our step-by-step instructions below. We'll take you through how to choose flowers and foliage that will make it easier for you to arrange, and how to build your design layer by layer.
Step ONE :
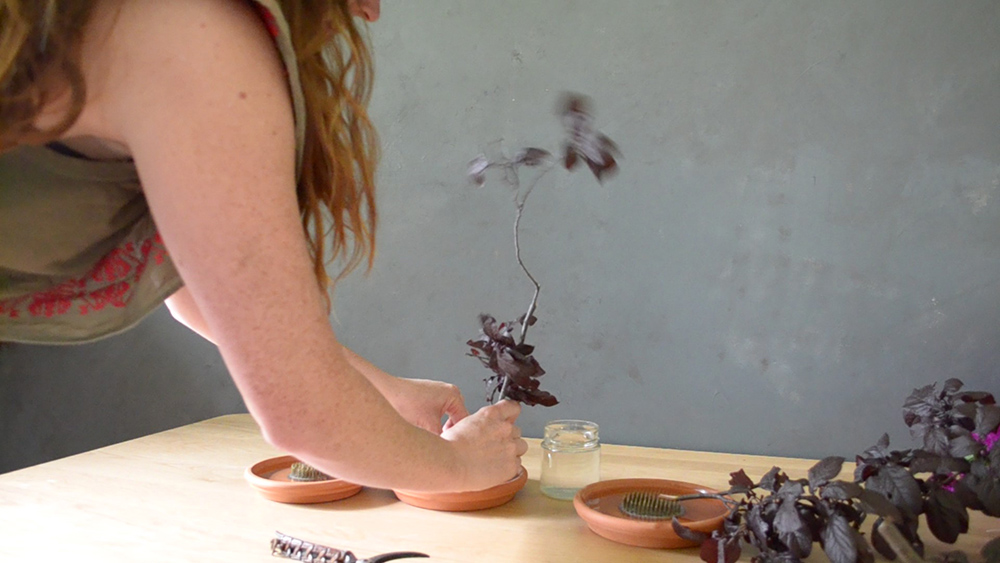
Get everything ready to go; kenzans, bases to hold water, snips or secateurs, flowers, and foliage. Place your kenzans into your bases and fill with water.
For the bases we used terracotta pot plant drip trays, with 1 large and 2 medium kenzans.
We used just 3 types of flower and 2 types of foliage. Limiting your elements this way makes it easier to create an elegant design that doesn't look too messy or confusing.
When choosing your flowers & foliage -
- select foliages that are the same or very similar colour.
- select flowers that contrast with your foliage.
- make 1 of the flower varieties your "focal", or the star of your design, and the other 2 will play supporting roles.
Step TWO :
Start with your first foliage; we used cherry branches. Place these toward the edge of your kenzan, leaving the center of the kenzan free for the rest of your flowers.
Prep thicker stems by cutting straight up into the branch, then use the sharp edge of your snips to scrape the outer bark off. This helps the stem to take up water. Place the branches so they sit along the table, stretching out your arrangement to create length.
One or two pieces can be placed centrally, and a little higher.
*TIP! Don't be afraid to add a little height to your arrangement! If the higher stems are thin and delicate it will not obstruct your guests' view.
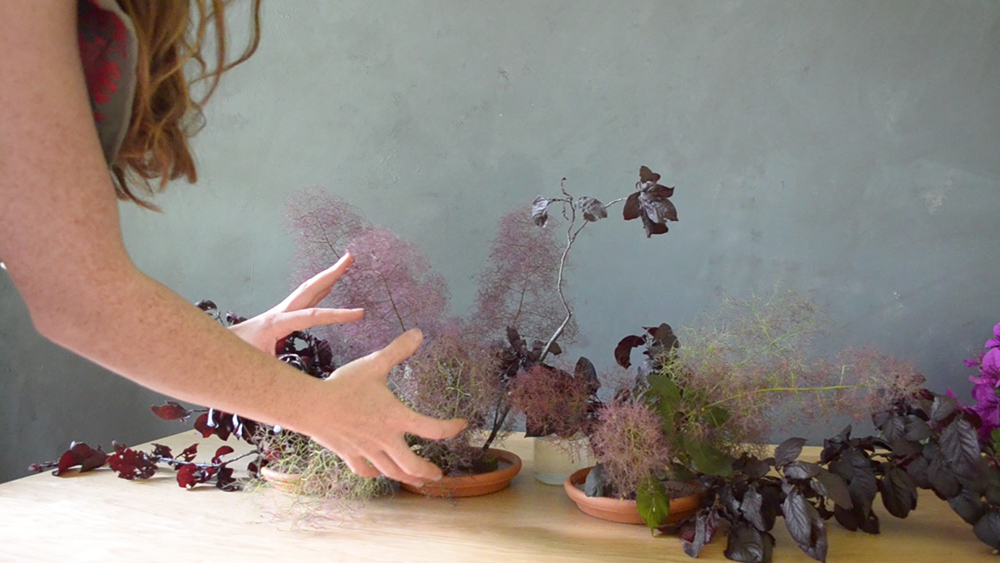
Step THREE :
Once you are happy with the first foliage, fill in between with your second foliage; we used smokebush. The aim is not to fill up the rest of the space - you want your flowers to do that - but just to fill in slightly and spread the foliage along and through the arrangement.
Don't forget to split the stems by cutting straight up at the base if they are thick. This also makes them easy to insert into the kenzan.
Try to aim for lots of height variation, this will make the arrangement look much more natural.
Step FOUR :
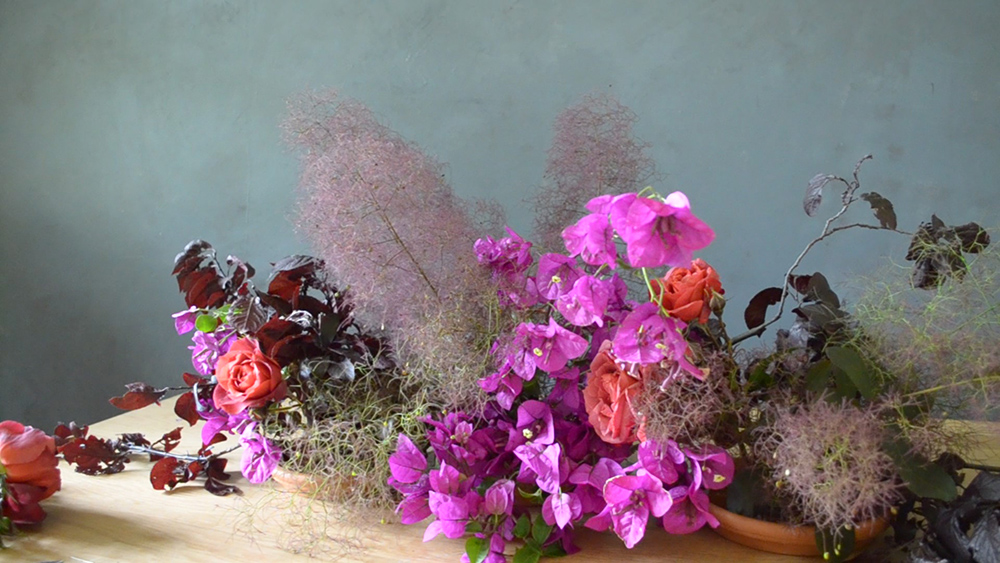
Now that we have a nice foliage base, it's time to add the first flower!
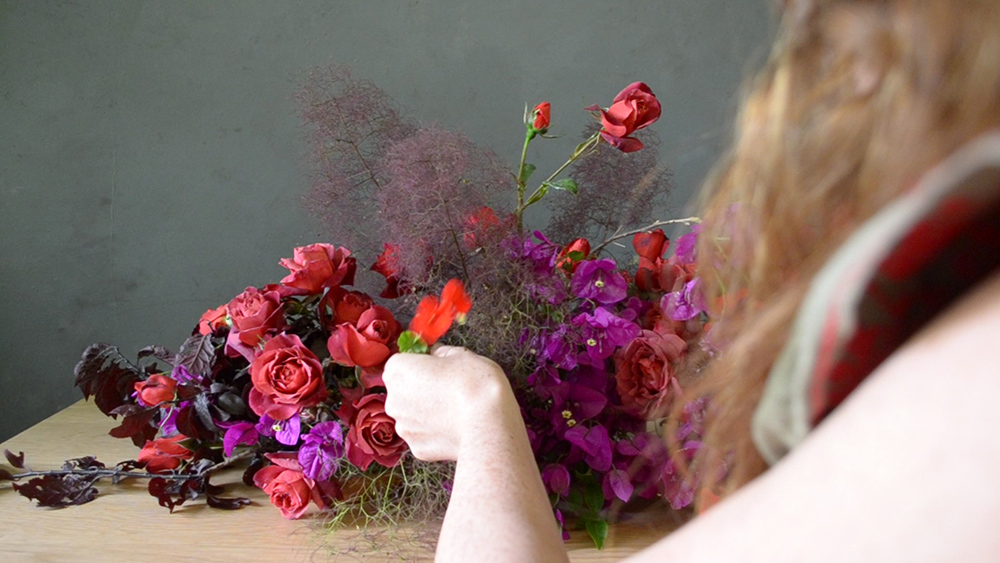
Start with your "focal" flower - the one you want to show off. Group the stems of this flower together to create the most impact, but save a little to add the colour elsewhere. We kept most of the focal flower (bougainvillea) toward the middle of the arrangement, but added just a touch to the left.
Make sure to leave a little room in the kenzans for your other 2 types of flowers.
*TIP! You can use a technique called "recessing" to create depth in the arrangement. This is where some flowers are placed further in, and some are placed sticking further out.
Step FIVE :
Once you are happy with your focal flower, you can add your 2 supporting flowers.
We also grouped the second flower (hot chocolate roses) in 2 clusters - one on either side of the bougainvillea. But as with the bougainvillea, we also spotted a stem or two through the arrangement to spread the colour slightly.
Place these in the same way as with the focal flower: cutting some stems shorter to place further in, and leaving others a little longer so they stick further out. Don't forget to vary the heights so it looks lovely and natural.
The last flower variety we added was red geranium. This was just to lift the look of the arrangement with a touch of bright red, so we only used about 5 stems, and spread them evenly along the entire piece. We also placed these at different heights, and different depths, using the "recessing" technique.

You're all done!
Finish the look with plates and cutlery, or tuck a few glass cylinders with candles in them amongst the flowers. You can even place some fruit around it for a festive vibe - cherries and pomegranates cut in half would work wonderfully here.
Lastly, just to recap the steps above:
- Start with your foliage, working low along the table, then add a little through the middle.
- Split any thick stems by cutting straight up at the base to help them drink, and make them easier to place into the kenzan.
- Group or cluster each type of flower together for maximum impact.
- Vary the heights, and don't be afraid to add in some taller stems if they are delicate.
- "Recess" some of the flowers, cutting them shorter and placing them further in, then placing others further out to create depth.
- Don't forget to add flowers to both sides of the arrangement (if you have guests sitting on both sides of the table).
- Be careful of the kenzan pins as they can be sharp! And don't forget to top up your water Christmas morning, if you've made it the night before.
Most importantly - have fun! Kenzans are very easy and fun to use, and do not require loads and loads of flowers like a vase would.
You can go for a walk with the kids to pick some lovely things from the neighbourhood to make your arrangement, or purchase some locally grown ones if you have something in mind.
In Australia our Christmas falls in the Summer time, so it's lovely to try and use seasonal flowers. Whilst traditional Christmas arrangements are usually winter-based, you can always create something unique, and make it your own, using what's in season locally instead.